Sunday, April 20, 2014

A look at Unity

I've decided to look into the shader options of unity since its already on our school laptops and i wanted to mess around with a fancy engine. Everything I'm looking at today i got off of unities help area/website. First thing i got to say, theres more than 80 built in shaders and shaderLab as a way to create more of your own. Shaderlab lets you add surface, vertex, fragment, and fixed function shaders, while the preset shaders revolve around vertex-lit, diffuse, specular, bumped diffuse, and bumped Specular. From there the built in shaders split into 5 parts; basic, transparent, transparent cutout, self illuminated, and reflective.


The first shader I'm going over is Parallax Bumped Specular, sounds complicated, but its just normal mapping with better depth. Its adds a height map from the normal maps on the object and creates greater depths on rendered objects. Makes these stones look like the have really deep rivets. The height maps are achieved by getting alpha maps from the normal maps where black is no depth and white is max depth. The specular portion is based of the blinn-phlong lighting model. The reflective and highlighted part on the left is a simulated blurred reflection of the light. The Shininess slider effects the strength of the reflection. A more complicated version of what what we've done in tutorials, but still not that complex.


The farther you get in the list the cooler stuff gets. First on the left we have a transparent version of our last shader, the transparent values of the object are taken from the alpha channels of the main texture. So its works just the same as transparency for sprites. Next the middle picture its self illuminating a cool simple shader, you add a texture to be the illumination map, based on the alpha values, black being no light and white being max light. The white sections light up no matter how much light is hitting them, so it creates a glow in the dark effect. Finally reflection on the right, its a simple reflection and it requires a cubemap to actually show a reflection. Like before with illumination, the strength of the shader is based on the alpha channel of a texture, and once again, black means no reflection and white means full reflection.

Another shading method that can be used in unity is the Surface Shader. The surface shader interacts well with Unity's lighting pipeline well so its priority use is for shaders that deal with lights. It doesn't have its own language like GLFX, but it can be used for some interesting effects. 

Heres an example of one surface shader. This effect  is created by moving vertices along their normals. The surface shader is able to do this because data from the vertex shader can be passed on to the surface shader which goes pixel by pixel. it can be summed up simply with this line  
v.vertex.xyz += v.normal * _Amount; 
where "amount" is a multiplier between -1 and 1, that can be attached to a slider in unity. 

I'd like to go through a few more shaders and some custom stuff made by me in unity, but I also want to check out other engine's shader options, like the unreal engine.

Saturday, April 19, 2014

Street fighter 4

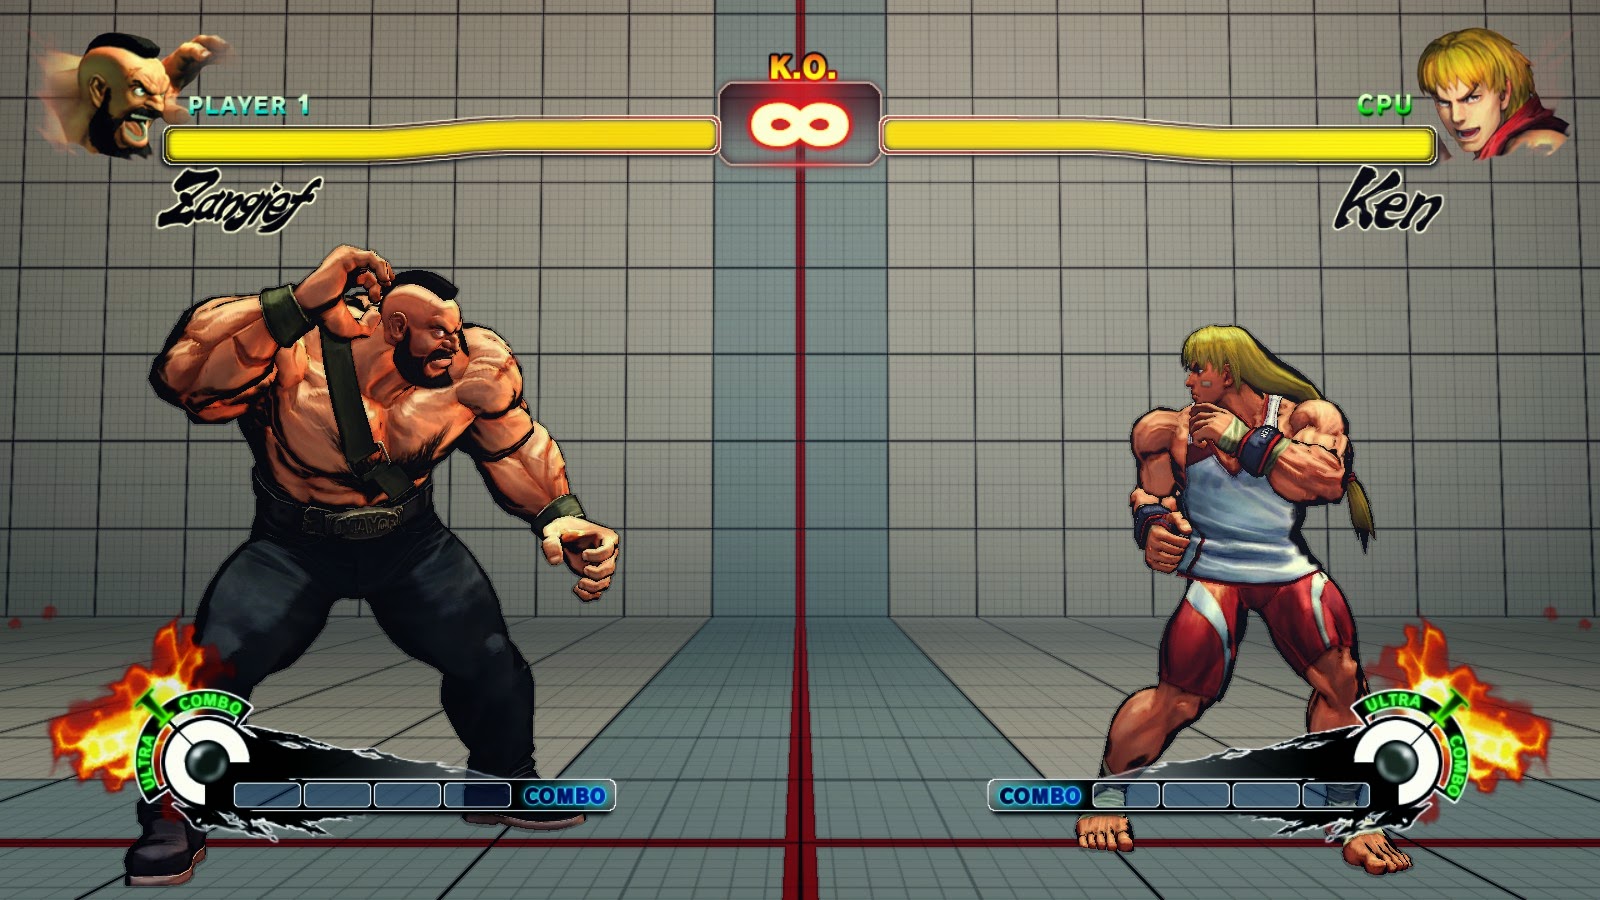
Today i want to go over the lighting effects in super street fighter 4. I noticed in the options menu that the game had 3 extra effects Ink, watercolour, and posterize. I'll be going over the three because they actually create some cool effects and street fighters art style has been talked about since its release. The first style is Ink, its the first and most used style. A lot of the concept or for street fighter 4 used heavy ink lines an example under this text. the way the effect is done is pretty simple, its the same way we did border detection for toon shading. The screenshots that i showed before of toon shading in my game used the same visual effect. By taking camera information, and normals, and calculating the area seen by the camera or light, the edge values are just the dot product of the light direction and the normals. The parts closes to the edge are around zero. Making a range around zero will highlight these edges. Heres the process reversed to see only the edges and black out everything else

The next effect is watercolour, Disappointingly it the same effect but instead of changing the edges to black it changes them to a maroon like colour, its lighter than the black and it does look fairly different, but it kind of fails to really express a watercolour like visual. I'd like to point out that when a character uses a powerful move the shader goes back to the old ink look on the characters. So the border is used twice as much and the black outline becomes even greater

 Finally the posterize effect heres an example of what its suppose to look like, the colours of an image chosen and created into multiple thresholds. thats makes a multicolored image into a little under a dozen.
Now this is the street fighter version, once again the same effect, but with a little difference. Street fighter already uses vary little colour differentiation and already looks like a toon like image, so the posterize effect here changes the normal border effect colour and range, notice all the highlighted areas are under the character now. This can simply be done by changing the range of the of the border select or by basing the border select off the light instead of the camera.

The effects used ended up being much lazier than i expected. They could of gone all the way with there effects, and actually made a posterize and watercolour effects.

Sunday, April 6, 2014

3D lighting in a 2D scene

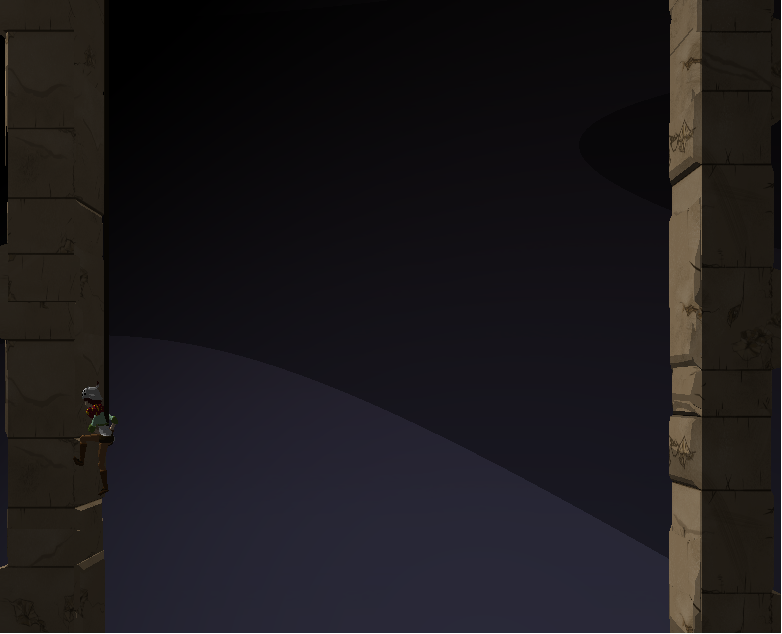
 An update on the game's main look so far. Decided to take out the Toon edge bolding, but kept the lighting technique. As for the hit box detection from last blog, it was pretty easy to do, but since our animator has a problem with getting animations done, I needed to drop it and attacking out of our game. All I could really show would be a screenshot with slightly red characters, its much for visible in video, but I've long since gotten rid of it.
     I also added a cool lighting effect. The farther you get the darker it becomes, I have a rather large skybox background lerping from bottom to top and back again. I also have the ambient lighting lerping, now all I have to add is a sun and a moon that can slerp by and I have a nice day and night cycle. This caused a cool effect I wanted to look into. The bars of light slide around in and off screen, as you see from the first screen shot there are 4 colours, then it moves to 3, then another 3. For the most part this colours slide around, in the last screenshot you see that the darkest part has moved to the far right corner.

     Now I didn't really use any code to do this, other than of course simple diffuse toonshading. I realized that this effect is coming from the large plain in the background, and it being so large that the spotlight doesn't hit it correctly. lighting on a flat plain was kind of cool to me, because the idea of 2D realistic lighting came to mind and I decided to look it up.


just  some examples

    Now the first one seems pretty easy, its probably already created in the sprite, and if its not its simply an orb that adds to the colour values around the blast with a gradient edge. Now the other one blew my mind when i first saw it.

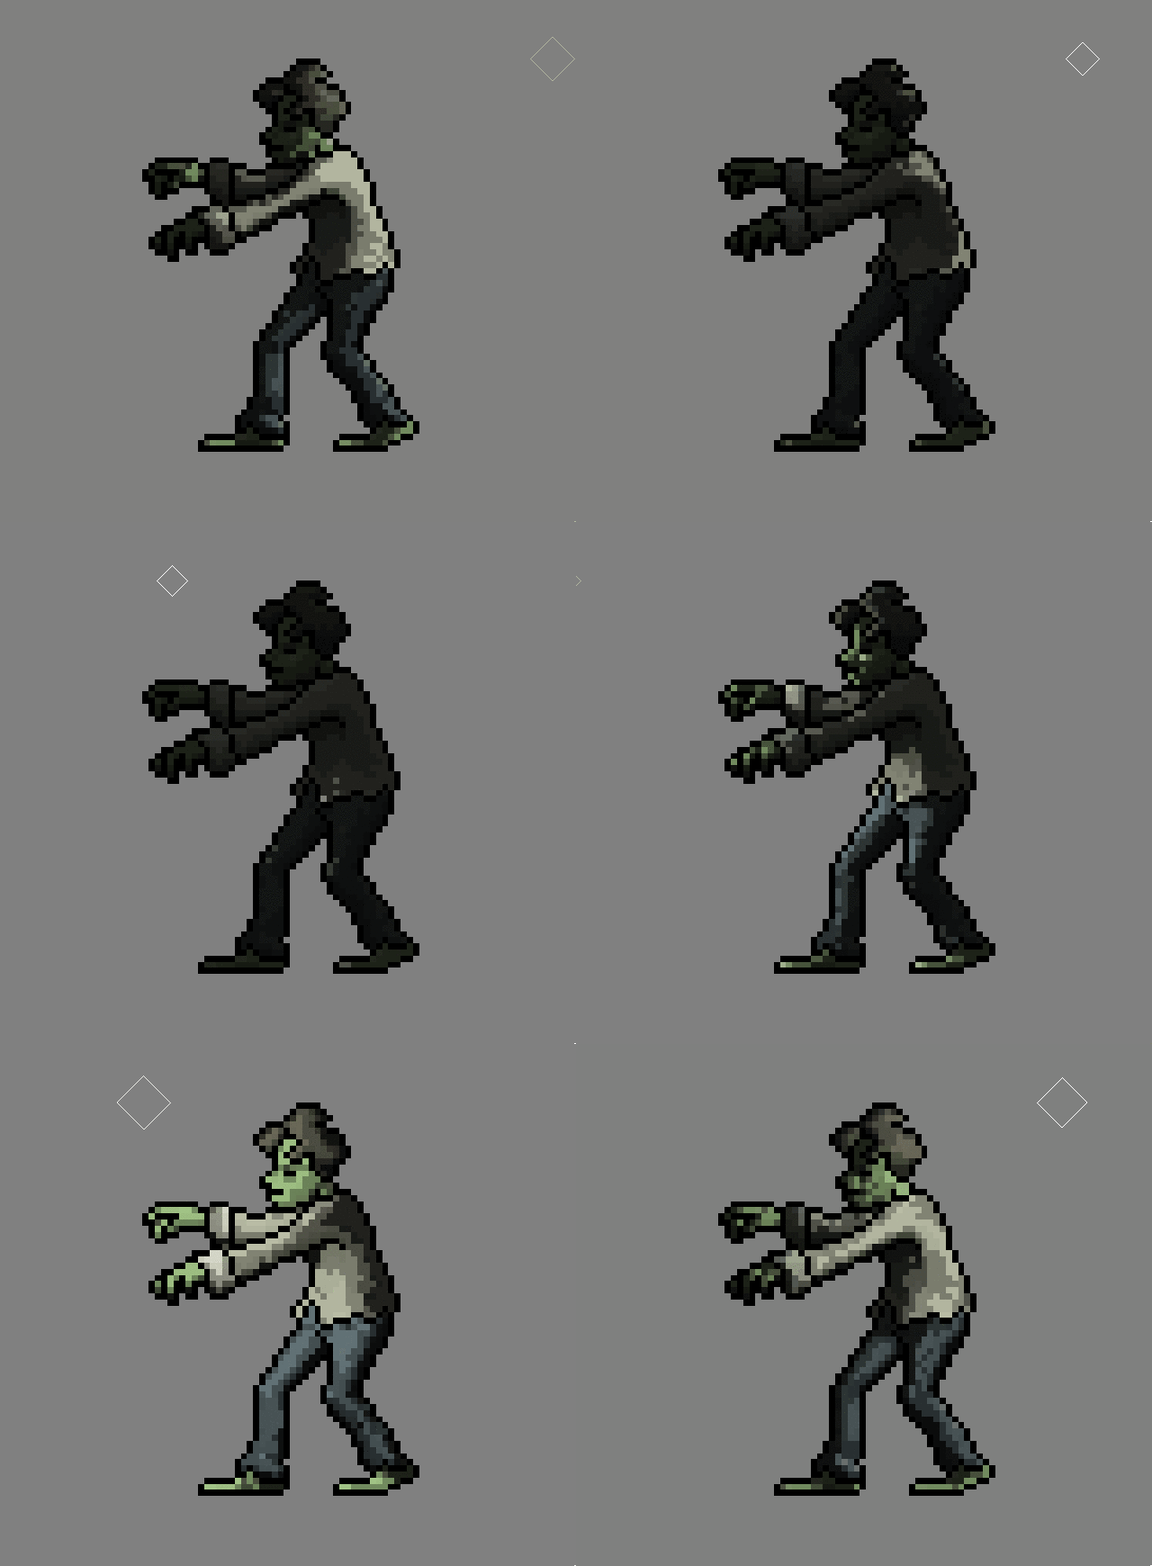
https://www.kickstarter.com/projects/finnmorgan/sprite-lamp-dynamic-lighting-for-2d-art Is a kickstarter for a lighting engine for 2D games. It can generate normal maps for sprites that can use simpe lights to create effect like the one shown. Now the hard part is being able to take in any sprite and create normal maps that work as well as this one, but the concept of how those normal maps would work on a sprite like this is pretty easy.

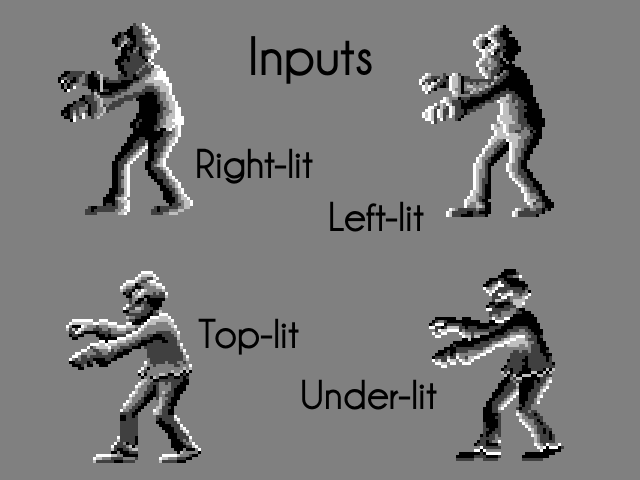
     Of course this is all assumption, but from what it seems to me its kind of simple. The program creates 4 normal maps, a version of it lit from each side, top, bottom, left, and right. from there on 2D lighting on a 2D sprite could just be chosen based on separating x and y potions. when the light moves from left to right, it just has to trade normal map dominance. Thats why when the light is far left lit looks like the left lit normal map, and when its far on the right it looks like the right lit shown here.
     The sprites lighting is pretty much transforming from left to right based on the x position. Now if you do the same for the Y and combine the two lighting in 2D should work fine. Now in the Gif the light moves behind the sprite, now of course its not actually rending how the light hits the sprite its probably something as simple as a multiplier based on the z position. The farther it is away from the base Z the dimer all the lights are. When the light comes around the left side, it slowly reveals the the left lit normal map. It kind of acts as an ambient light, even though it creates the effect 3D lighting.

Overall its a pretty cool lighting, I'm pretty sure i manage to figure out how the lighting works, but I have no clue whatsoever how it generates the normal, Depth and Ambient Occlusion maps is beyond me.

Unity seems to also incorporate some 2D lighting, but it seems to require some normal maps beforehand. Overall its an interesting topic and it can create some interesting effects.

Sunday, March 9, 2014

Unique shading situations

Well for a quick update of the game,

Cel shading and some border outline has changed the look of our game where I wanted it to go. I decided not to use Sobel edge filtering because I like the simple boderless images details on the character, and only wanted it around the characters. Today

My next task in graphics is to make an affect for attacks, so that they are more visible and give the player a good way to get warned that attacks are coming at them. Two things came to mind and they are both games with only plane of movement. First for the theory, is Metal slug. Its an old 2D side scrolling shooter and since it has a lot of stuff going on in it, enemy bullets/grenades flashed bright blue and yellow. Bullets flashing blue and yellow can be seen in this picture here. 
There is going to be a lot to dodge in my game so having a good notifier is important. Now this is blog is for a graphics class, so just making a texture or a sprite with big colours isn't gonna be enough. That's where the second inspiration comes in.

Netherrealm studios have made two fighting games so far, Mortal Kombat and Injustice Gods Among Us. The games have a lot in common but I figured out they shared a feature in training mode. In both games theres a setting to have a character's limb highlight in red when he attacks with it. an example here http://www.youtube.com/watch?v=0h2a4RC5Xus , skip to pretty much any time during the video to see Scorpions hand's turn red during punches and legs turn red during kicks. It seems like the limbs turning red are chosen before hand for moves, but I' thought of a better way to pull it off. Since we are already using hitboxes i thought using them to choose what would be red would work. The basic idea is this. 
Since my game is mostly on one plane, Like mortal kombat, I have a few options on how to do this effect. Probably the easiest would be just like the image above explains, but using someing like this as the base, 

With some tinkering on world and normal locations I was able to just highlight objects that where in the middle of the game, The background, and wall are taken out while the rest is left. This also creates and Xbox avatar like glow effect. So any hitboxes that will highlight stuff can be sent through this shader, Simply mixing (the mix(); function) this output and an output with all the location of the hitboxes and how they would appear on screen should keep the background black, and any parts of the model within the hitbox red. This methods also adds a bit of an extra affect, if a hitbox hits something it also goes red. I plan refining this shader for next blog, and some other effects.

Sunday, February 23, 2014

Midterm Madness

     Well Midterms are bringing there ugly head around, and i seem to be putting most of my studying towards Graphics. Over joyed that the midterm is only worth 10%, and is in  the afternoon, morning midterms are hell.

     I have been studying off a combination of old notes and the midterm slideshow, and I find that by the end of the slideshow I was happy I made some notes. For example the slideshow only contains 1 slide on toon shading, but it was almost the main point of that class. I guess hes just not having much of it on the midterm. I can sum up all the content this far as categories, i feel that writing it out will help with studying, and should make a decent blog. Listing off as follows, Basics of Computer Graphics, Textures, Basics of Shaders, Shader Examples, Lights and Shadows.

Basics of Computer Graphics-
    Vertex shader, Triangle assembly, rasterization, fragment shader, All need to be known, and understood. We learned it in intro to graphics, and we had questions on it with the midterm and exam.
How 3 dimensional assets are created, seems like really simple stuff to put on a midterm review, but I guess there's gonna be something on why we use triangles over squares, (it takes more processing power).
Textures-
   UV Mapping, mapping the texture to certain pixels of the 3D image. Types of textures, bump mapping - getting normal information off the texture, and displacement mapping- getting displacement information from the texture, displacing the pixels individually.
Basics of Shaders-
More specific things in the graphics pipeline, where the shaders, VBO.A and textures happen.
Shader Examples-
     Like I talked about earlier toon shading is a good example. Some examples should be known, like the monocolour/colourshaders in Dan's tutorials, or edge tracing.
Lights and Shadows
     This ones big, the difference between Ambient, diffuse, and secular. Toon shading is removing the gradient of diffuse and secular by making a function that only has a set amount of lights, as in only have bright and a grey. Radiosity brightens areas, then blurs them to create a soft more realistic light looks. The didn't mention it in the slide show, but we did talk about ambient occlusion which asks how many objects are in the way of the light source? And bases lighting off that.

Thats a quick summery of what I have gone over, So far this midterm seems like its gonna be a lot more theory compared to animations and intro to graphics. Wish me luck

Sunday, February 2, 2014

Harder Than it Should Have Been

     Second semester is on its way, and a new class asks for blogs. The things are my kryptonite, and I don't even really have powers. For reasons I don't really feel like sharing with the world wide web writing forms like this are ridiculously difficult for me, but I got to give it a shot.

    Intermediate Graphics, if Introduction to Computer Graphics, and Computer Animations had a big brother it would be this class. I'm going to sum up what I learned from week one from my perspective.

1. Most of the code in Introduction to Computer Graphics was a trick (SFML and immediate mode), you're going to have to drop it and remake your code with what we're using if you want a chance.

2. You are gonna have to stress out at least once a week, for a non code related task. As in Blogs are mandatory, and there worth a hell of a lot.

3. Homework questions are back, this time with a twist, it has to be in your framework and there marked properly. Meaning the lead programmer better get it together or everybody goes down.

4. Mr. Hogue is really unimpressed with our midterm and exam scores there worth less in this class.

    Those for points have been haunting me for the last few weeks, but enough of that into actual course content.

This is what our first semester prototype looks like.

     So far it has a really simple art style that can be improved by incorporating pretty much anything that has been shown in class so far. To knock the big one off the list, cel shading would work wonders with our simple colors especially on our protagonist. The best comparison for a game we would like to match would be Legend of Zelda: Wind Waker
    cel shading it self seemed pretty simple, We covered it week 3. instead of using a gradient for lighting, 100% being black and 0% being the original image, just average it out i.e. from 40% 100% will be grey. This end up making everything have two colours (implementing more is easy), one for the original and a darker version for shading. Seen in this wind waker picture, links cloths are green, and dark green where the shading is. 

    What got me really interested with the toon shading was creating black borders, using normal values to know whether something is facing the camera never crossed my mind. I'd love to see what playing with some of the ranges of that and the toon shading would look like. Especially reversing the roll of the border shading and only having color on the borders, creating a sort of highlighted edge effect I think would be awesome for certain scenes in the game. To be more specific Specular lighting, calculate the value of light seen by the viewer, if the value is close to 0 make it black. moving the range somewhere other than zero could create some weird border effects as well.

    What i really want to do this semester is combine some of the shaders with some stuff we learned form animations last semester. More specifically creating scenes with a combinations of lighting effects and particles. 

Two main scenes i would like to get into the game are snowing and raining. Raining is really rarely seen in cel shaded games, and usually its just a simple particle effect and not much else. I would love to throw in some lightning by making a super bright ambient light for a second, and otherwise having some really distant dark lighting, with borders highlighted like i said earlier. While for snowing I want to try using the toon border method but moving the values to somewhere in the middle and see if i can get a snow covered effect. 

Another tool from this class I would like to incorporate is bump mapping, it wont really be used by me as much, but it would be great for my artists. Most of our enemies are humanoid figures and they seem to have more and more triangles. bump mapping will be nice for lowering that.

Next weeks blogs, going to be on week 4 and 5. I was sick week 4 so I've missed the classes, but I plan on doing some research on the topics in the lectures online to catch up.