Friday, September 26, 2014

Year 3 - Game Dev, still going

    Another year another class that's trying to kill me. I welcome game engines with open arms, I've fought through the year of Hogue and I'm up for its challenge. So far so good, they've learned from homework systems, With due date a student understands when material will be introduced to them, and have a community of students all on the same page. So far the lectures have become large tutorial videos explaining some core mechanics of 2LOC, and how we should use them. A new collection of pointers to play with, and a series of exceptions systems that I'd usually save for clean up when writing code. Lectures consist of lengthy explanations of simple review and advanced theory, combined with a slide or two of lifesaving syntax. The syntax shown is so important because "Googleing" isn't really an option with 2LOC. This isn't as much of a problem because the people teaching lectures and tutorials are easy to contact. I plan on completing my 4 easy questions before the due date. To sum up the course so far its going good.

Since we haven't gotten very deep in content yet (last tutorial was setting up a camera) I thought I'd talk about some concepts I've been going over for my GDW team. As of resonantly our game has gotten a complete override, we've completely ditched our last idea because we felt the scope was much to large. We have many skilled people on our team, but we felt the design side would prove to be to much for a few students in a year time. We decided to go with our back-up idea of making a FPS game with fighting game like combat. We thought that we could still put some work in as far as art and content goes, but the real reason we changed was because this game direction will let us make the game much more fun. What I'd like to talk about in this blog is why we think something thats competitive is going to be more fun, but also how making it properly is harder than you'd think.

My Favorite genre of video games is fighting games. They are usually the hardest to make, taking the normal requirements of good art and programming, but also the challenge of getting multiple people to face off. There is a winner and a loser, but since this is a game you want both to have fun. You need a combination of balance and understanding of skill. With a cooperative or singular experience, you have a player or two going towards the same goal and for the most part experiencing the same things. Even with large multiplier games where you have teams facing off against teams, the vastness of the differentiation of skills and choices allow some balance to come naturally. With 1 vs 1 fighting games the story is different. Both players may start the same, look into the game the same, but the difference comes when you have compare their individualism. It can be as simple as people picking characters suited to them, to people just orientating towards certain playstyles(offensive defensive). These factors make balancing a game harder, because its hard to take two different players, with different variables and skill level and making the game feel fair.

I can't count the amount of times I've seen people lose interest in a game because someone beat them too hard, or they felt cheated in defeat. Recently competitive games have found a way around this factor and that has been simplification. Games like League of Legends, towerfall, and Nidhogg. Taking RTS's and simplifying them to 4 buttons per character, taking a shooting game and simplifying it to 2D, and taking a fighting game and simplifying it to two characters of equal strength. These games follow a play method of easy to learn difficult to master. It just works better with the general population. I personally like it more when I can chose my own fighter and hes his own original thing. That is because i think individualism in fighting games, allowing a defensive player and an offensive player to thrive, lets a game have more depth. 

I'd like to talk about one of the games i mentioned specifically, Towerfall. Its where the majority of our game idea comes from. Its a 2-4 player game that involves Archers facing off against each other. Each archer starts with 3 arrows and they can jump, dash or shoot arrow. Jumping is used for movement, but jumping on opponents heads is a way to defeat them. dashing makes you invisible for a short period of time, moves you fast and allows you to catch arrows but is limited. Finally you can shoot arrows to kill opponents and you can pick them up by walking over them after shot. Its a pretty simple game, but we're pushing it to the 3rd dimension and making it a FPS. I'd like to go over the things we're going to face in this blog. 

Guns with limited ammo that must be picked back up, a movement system, and a parry method. Now FPS makes some problems real quick, first off multiplayer on FPS is usually on different screens. This means we are going to have to look into the online functionalities of 2LOC. This is a Fast paced game and if packets can't be sent from computer to computer fast enough we are going to have to limit it to split screen or use "dirty" methods like prediction based on player gameplay. Personally I think that systems that some FPS use are absolutely terrible. Its the idea that if the host isn't getting the packets in time, the game will fill up the missing information with assumptions based of what was last known. Thats why in some games when you lose connection you see players continue to walk into walls. I personally hate this method, and when similar methods are found in fighting games its considered blasphemy from fan bases. Theres also a lot of gameplay problems that come from just porting one idea to the other. For one, with limited ammo in an FPS collecting ammo is completely different from something like TowerFall. Towerfalls map loop, like pacman, so technically nobody is ever actually above or below somebody else. In an FPS creating connecting segments like this is much harder to create in a full 3D game. Without these connecting maps you encounter a problem with limited ammo. All of a sudden Jumping is unbalanced, if somebody shoots while you're in the air, their bullet hits the ceiling, traveling way farther away then someone shooting at the ground. its now also harder to get to this bullet now that the maps don't loop. Also aiming is harder in 3 dimensions than 2. The transition to 3D is going to cause a lot of reimagineing of this idea and I know my group and me can pull it off

Monday, April 21, 2014

Exam Review

So Last semester I wasn't too ready for the final exam, I underestimated it and got hurt because of it. This time around I've been getting ready to the point where I've started looking ahead to knew engines and shaders in areas that weren't totally covered in class.
Lets not have a repeat of this.
 

I've been studing for the last few weeks, so I thought it would be good to blog some content, being able to explain something always helps keep information in your head. I did this for the midterm as well, but it was a lot simpler than what I'm going for now.

I wont be covering the most basic stuff, I know the graphics pipeline, and how meshes are made, thats covered in my midterm review. As well as normal/ displacement mapping and toon shading.

A quick not is the 5 steps to HDR bloom, render to FBO, Tone map the FBO, Gaussian blur(Convolution kerning) and then render the blurred version with the original FBO.

Motion blur is done by using a accumulation buffer, rendering a bit or the last few and later frames.
I've gone through tons of code on particeleffects in shaders. Velocity based shaders are also done by rendering frames ahead and then subtracting their values. The ins and outs of deferred shading and lighting, how its done, and why we use it. A whole bunch of shadowmapping code examples. Threshold through photoshop tutorials, and over all just playing around with new engines and their shaders is what i've been using my time on

Unreal engine

Last blog I went over shaders in Unity, today i want to take a look at the other U engine, Unreal. Once again using the official tutorials. While writing shaders in manually is possible in Unreal (actually ShaderDevelopmentMode, is disabled by default) I'm going to go over the material editor, and lighting.
Heres a quick look at a simple version of the materiel editor being used, with GUI more common in hardware development, the properties of a material are set up this way in Unreal. On the left we have a big box with a lot of inputs. Thats the material, and its name can be seen on top. The inputs cover a large portion of data and maps. Texture, spuclar and a normal map have been applied simply by loading in the texture and connecting it to an open slot on the material. Theres also use of speed tree, a program used to make quickly randomly generated trees. In this case its connected world position offset, which lets speed tree change the world space of the vertices.

Honestly at fist glance this system looked great, easy to read and understand and it covers a lot of the basics for shading materials. Once i figured out about Material functions it was pretty great. Material function are small material shaders that you can create to make an even simpler experience when using the material editor
 The example here shows a screen blend function, taking two layers and blemding them together. Now you can downsize all these windows into a single window, from the inputs to the output. This allows anybody to use your effect/shader with ease. The materiel editor is an awesome little feature that makes creating effects super easy, it can even use premade math function including things like Lerp and some you see from .glsl's like Clamp.
There are 4 kinds of preset dynamic lights in unreal and those are Directional, Point, Spot, and Sky lights. the reason i did this blog on the material editor and lights is because lights have light functions that can be edited just like materials

I didn't mention that Unity has a similar approach to materials, but from what i've seen the Unreal engine's cleaner and simpler and is good for implementing the simple shaders that I'd use any day, but Unity still has its uses, allowing you to code in shaders by yourself easier.


Sunday, April 20, 2014

A look at Unity

I've decided to look into the shader options of unity since its already on our school laptops and i wanted to mess around with a fancy engine. Everything I'm looking at today i got off of unities help area/website. First thing i got to say, theres more than 80 built in shaders and shaderLab as a way to create more of your own. Shaderlab lets you add surface, vertex, fragment, and fixed function shaders, while the preset shaders revolve around vertex-lit, diffuse, specular, bumped diffuse, and bumped Specular. From there the built in shaders split into 5 parts; basic, transparent, transparent cutout, self illuminated, and reflective.


The first shader I'm going over is Parallax Bumped Specular, sounds complicated, but its just normal mapping with better depth. Its adds a height map from the normal maps on the object and creates greater depths on rendered objects. Makes these stones look like the have really deep rivets. The height maps are achieved by getting alpha maps from the normal maps where black is no depth and white is max depth. The specular portion is based of the blinn-phlong lighting model. The reflective and highlighted part on the left is a simulated blurred reflection of the light. The Shininess slider effects the strength of the reflection. A more complicated version of what what we've done in tutorials, but still not that complex.


The farther you get in the list the cooler stuff gets. First on the left we have a transparent version of our last shader, the transparent values of the object are taken from the alpha channels of the main texture. So its works just the same as transparency for sprites. Next the middle picture its self illuminating a cool simple shader, you add a texture to be the illumination map, based on the alpha values, black being no light and white being max light. The white sections light up no matter how much light is hitting them, so it creates a glow in the dark effect. Finally reflection on the right, its a simple reflection and it requires a cubemap to actually show a reflection. Like before with illumination, the strength of the shader is based on the alpha channel of a texture, and once again, black means no reflection and white means full reflection.

Another shading method that can be used in unity is the Surface Shader. The surface shader interacts well with Unity's lighting pipeline well so its priority use is for shaders that deal with lights. It doesn't have its own language like GLFX, but it can be used for some interesting effects. 

Heres an example of one surface shader. This effect  is created by moving vertices along their normals. The surface shader is able to do this because data from the vertex shader can be passed on to the surface shader which goes pixel by pixel. it can be summed up simply with this line  
v.vertex.xyz += v.normal * _Amount; 
where "amount" is a multiplier between -1 and 1, that can be attached to a slider in unity. 

I'd like to go through a few more shaders and some custom stuff made by me in unity, but I also want to check out other engine's shader options, like the unreal engine.

Saturday, April 19, 2014

Street fighter 4

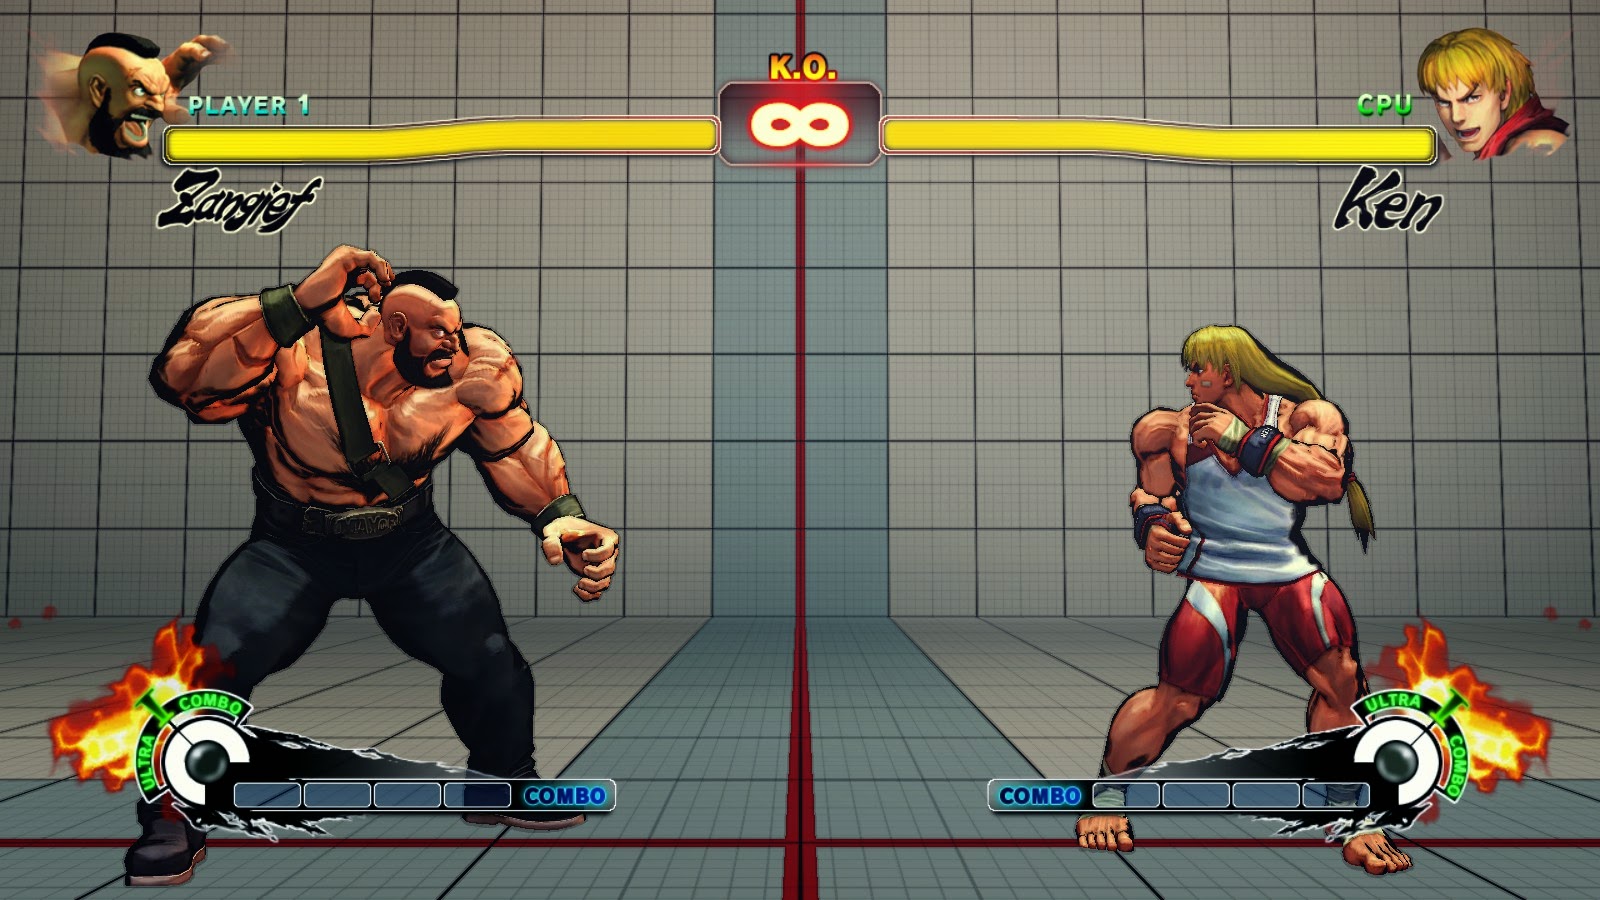
Today i want to go over the lighting effects in super street fighter 4. I noticed in the options menu that the game had 3 extra effects Ink, watercolour, and posterize. I'll be going over the three because they actually create some cool effects and street fighters art style has been talked about since its release. The first style is Ink, its the first and most used style. A lot of the concept or for street fighter 4 used heavy ink lines an example under this text. the way the effect is done is pretty simple, its the same way we did border detection for toon shading. The screenshots that i showed before of toon shading in my game used the same visual effect. By taking camera information, and normals, and calculating the area seen by the camera or light, the edge values are just the dot product of the light direction and the normals. The parts closes to the edge are around zero. Making a range around zero will highlight these edges. Heres the process reversed to see only the edges and black out everything else

The next effect is watercolour, Disappointingly it the same effect but instead of changing the edges to black it changes them to a maroon like colour, its lighter than the black and it does look fairly different, but it kind of fails to really express a watercolour like visual. I'd like to point out that when a character uses a powerful move the shader goes back to the old ink look on the characters. So the border is used twice as much and the black outline becomes even greater

 Finally the posterize effect heres an example of what its suppose to look like, the colours of an image chosen and created into multiple thresholds. thats makes a multicolored image into a little under a dozen.
Now this is the street fighter version, once again the same effect, but with a little difference. Street fighter already uses vary little colour differentiation and already looks like a toon like image, so the posterize effect here changes the normal border effect colour and range, notice all the highlighted areas are under the character now. This can simply be done by changing the range of the of the border select or by basing the border select off the light instead of the camera.

The effects used ended up being much lazier than i expected. They could of gone all the way with there effects, and actually made a posterize and watercolour effects.

Sunday, April 6, 2014

3D lighting in a 2D scene

 An update on the game's main look so far. Decided to take out the Toon edge bolding, but kept the lighting technique. As for the hit box detection from last blog, it was pretty easy to do, but since our animator has a problem with getting animations done, I needed to drop it and attacking out of our game. All I could really show would be a screenshot with slightly red characters, its much for visible in video, but I've long since gotten rid of it.
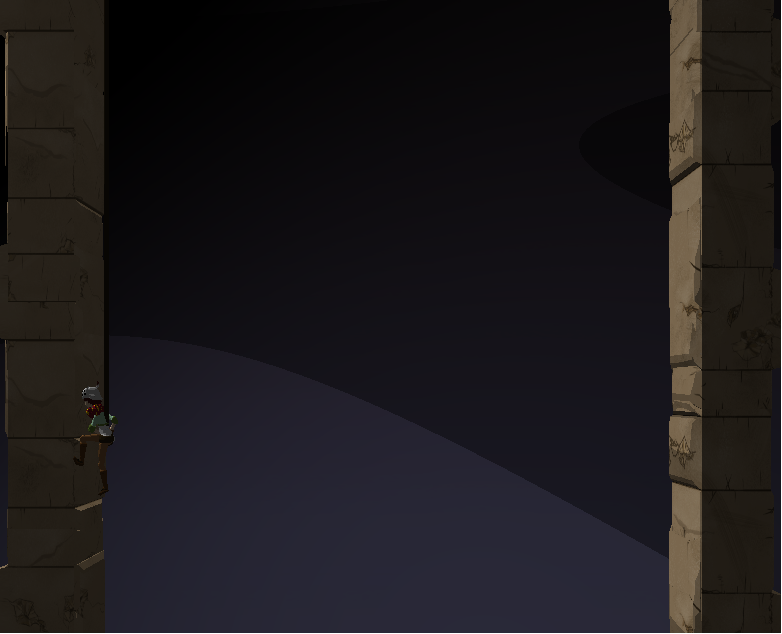
     I also added a cool lighting effect. The farther you get the darker it becomes, I have a rather large skybox background lerping from bottom to top and back again. I also have the ambient lighting lerping, now all I have to add is a sun and a moon that can slerp by and I have a nice day and night cycle. This caused a cool effect I wanted to look into. The bars of light slide around in and off screen, as you see from the first screen shot there are 4 colours, then it moves to 3, then another 3. For the most part this colours slide around, in the last screenshot you see that the darkest part has moved to the far right corner.

     Now I didn't really use any code to do this, other than of course simple diffuse toonshading. I realized that this effect is coming from the large plain in the background, and it being so large that the spotlight doesn't hit it correctly. lighting on a flat plain was kind of cool to me, because the idea of 2D realistic lighting came to mind and I decided to look it up.


just  some examples
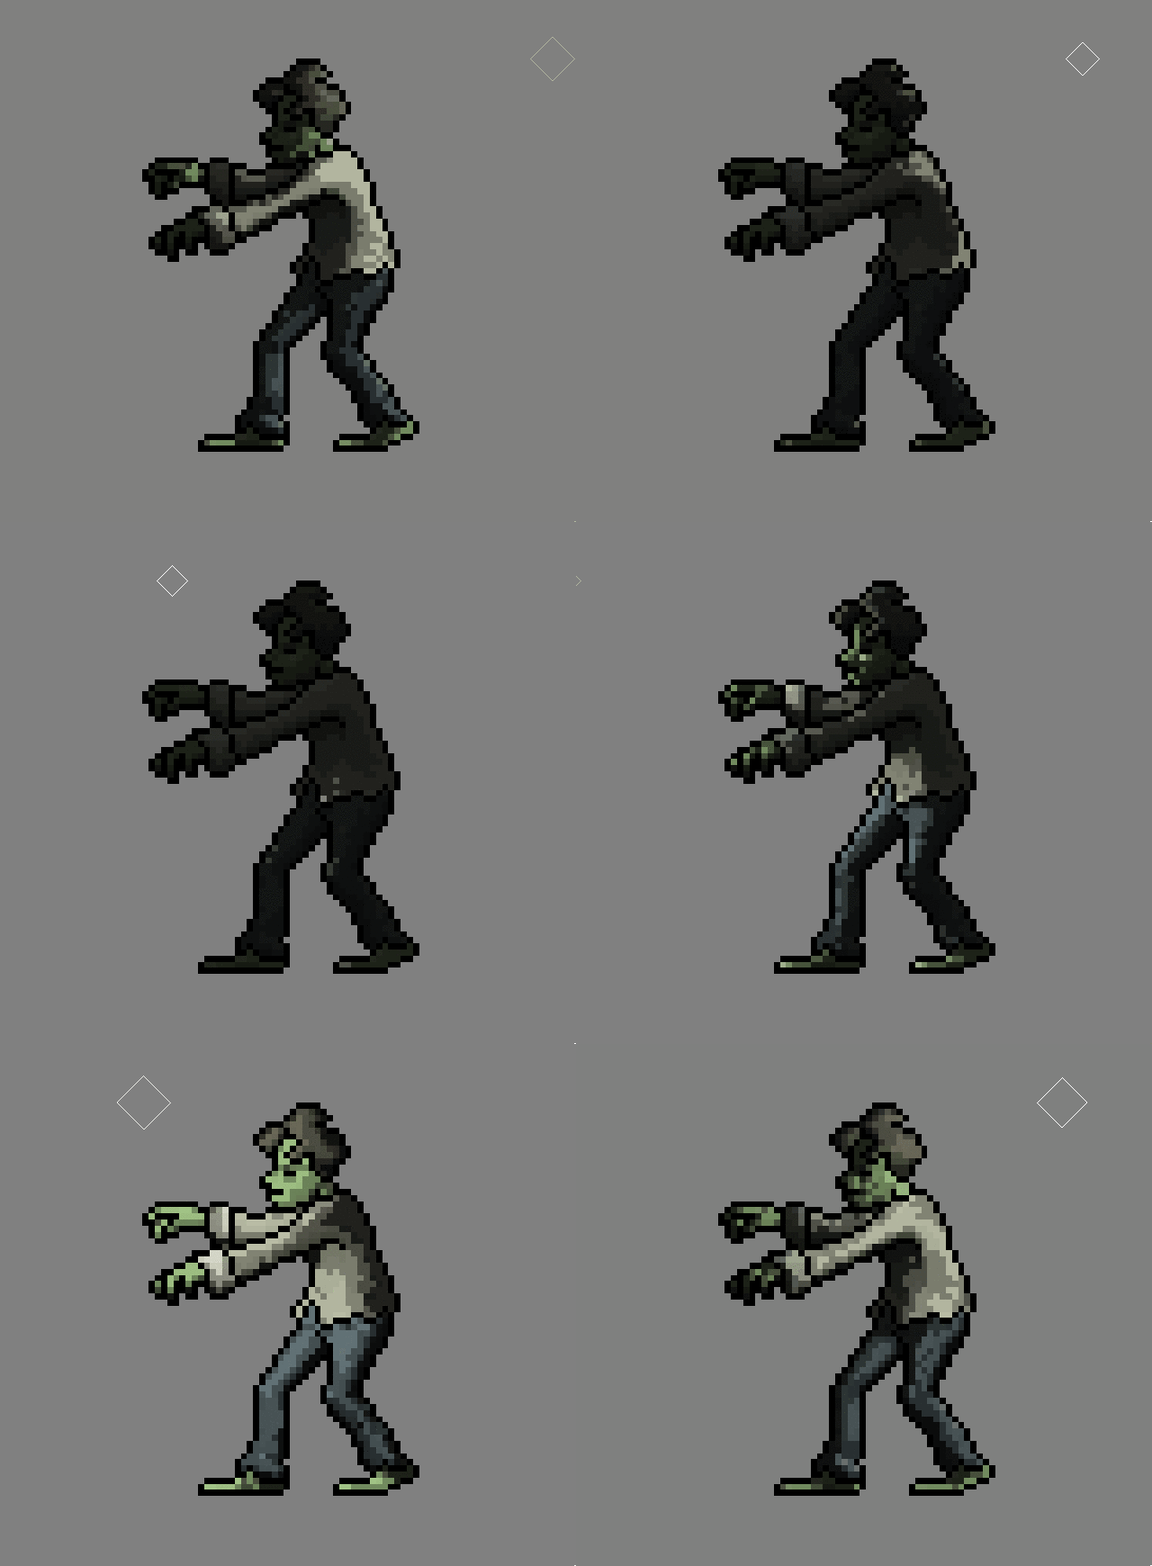
    Now the first one seems pretty easy, its probably already created in the sprite, and if its not its simply an orb that adds to the colour values around the blast with a gradient edge. Now the other one blew my mind when i first saw it.

https://www.kickstarter.com/projects/finnmorgan/sprite-lamp-dynamic-lighting-for-2d-art Is a kickstarter for a lighting engine for 2D games. It can generate normal maps for sprites that can use simpe lights to create effect like the one shown. Now the hard part is being able to take in any sprite and create normal maps that work as well as this one, but the concept of how those normal maps would work on a sprite like this is pretty easy.

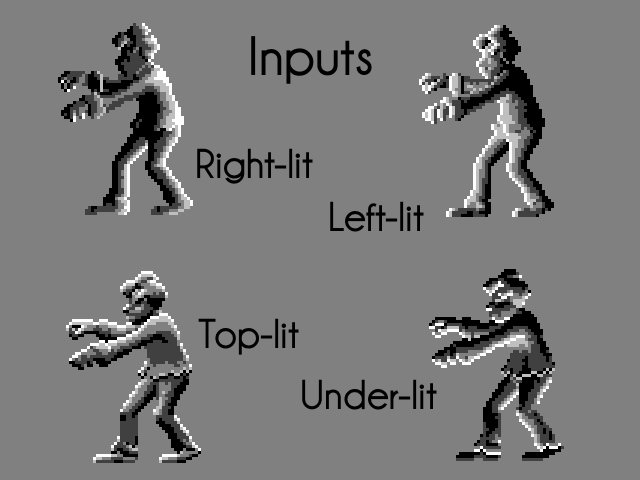
     Of course this is all assumption, but from what it seems to me its kind of simple. The program creates 4 normal maps, a version of it lit from each side, top, bottom, left, and right. from there on 2D lighting on a 2D sprite could just be chosen based on separating x and y potions. when the light moves from left to right, it just has to trade normal map dominance. Thats why when the light is far left lit looks like the left lit normal map, and when its far on the right it looks like the right lit shown here.
     The sprites lighting is pretty much transforming from left to right based on the x position. Now if you do the same for the Y and combine the two lighting in 2D should work fine. Now in the Gif the light moves behind the sprite, now of course its not actually rending how the light hits the sprite its probably something as simple as a multiplier based on the z position. The farther it is away from the base Z the dimer all the lights are. When the light comes around the left side, it slowly reveals the the left lit normal map. It kind of acts as an ambient light, even though it creates the effect 3D lighting.

Overall its a pretty cool lighting, I'm pretty sure i manage to figure out how the lighting works, but I have no clue whatsoever how it generates the normal, Depth and Ambient Occlusion maps is beyond me.

Unity seems to also incorporate some 2D lighting, but it seems to require some normal maps beforehand. Overall its an interesting topic and it can create some interesting effects.

Sunday, March 9, 2014

Unique shading situations

Well for a quick update of the game,

Cel shading and some border outline has changed the look of our game where I wanted it to go. I decided not to use Sobel edge filtering because I like the simple boderless images details on the character, and only wanted it around the characters. Today

My next task in graphics is to make an affect for attacks, so that they are more visible and give the player a good way to get warned that attacks are coming at them. Two things came to mind and they are both games with only plane of movement. First for the theory, is Metal slug. Its an old 2D side scrolling shooter and since it has a lot of stuff going on in it, enemy bullets/grenades flashed bright blue and yellow. Bullets flashing blue and yellow can be seen in this picture here. 
There is going to be a lot to dodge in my game so having a good notifier is important. Now this is blog is for a graphics class, so just making a texture or a sprite with big colours isn't gonna be enough. That's where the second inspiration comes in.

Netherrealm studios have made two fighting games so far, Mortal Kombat and Injustice Gods Among Us. The games have a lot in common but I figured out they shared a feature in training mode. In both games theres a setting to have a character's limb highlight in red when he attacks with it. an example here http://www.youtube.com/watch?v=0h2a4RC5Xus , skip to pretty much any time during the video to see Scorpions hand's turn red during punches and legs turn red during kicks. It seems like the limbs turning red are chosen before hand for moves, but I' thought of a better way to pull it off. Since we are already using hitboxes i thought using them to choose what would be red would work. The basic idea is this. 
Since my game is mostly on one plane, Like mortal kombat, I have a few options on how to do this effect. Probably the easiest would be just like the image above explains, but using someing like this as the base, 

With some tinkering on world and normal locations I was able to just highlight objects that where in the middle of the game, The background, and wall are taken out while the rest is left. This also creates and Xbox avatar like glow effect. So any hitboxes that will highlight stuff can be sent through this shader, Simply mixing (the mix(); function) this output and an output with all the location of the hitboxes and how they would appear on screen should keep the background black, and any parts of the model within the hitbox red. This methods also adds a bit of an extra affect, if a hitbox hits something it also goes red. I plan refining this shader for next blog, and some other effects.